
Wednesday, 30 March 2011
Public Art..
I've been thinking. Recently a classmate presented a seminar on Graffiti, and since then I've had a small desire to do some myself. I don't like the idea of running out, under cover of darkness wearing a hoodie and blasting the side of a piece of private property with some spray paint, but I do like the idea of leaving something highly inoffensive, harmless and easily removable in public, for all to see. So what would I do? Well, remember my little cork men of many moons ago? I think I shall be creating a little cork army and releasing them into the wild (either Birmingham or Leicester) and placing them in positions suited to their setting. I'm excited, more excited than I have been during my latest project! Finally, something enjoyable!
Saturday, 26 March 2011
Less of the Jibber Jabber
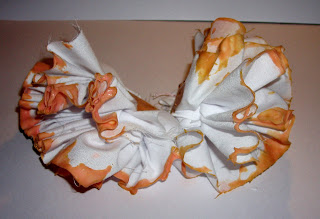
Here's my fanal piece. It's a Collar Brooch but could be warn anywhere on the chest really.

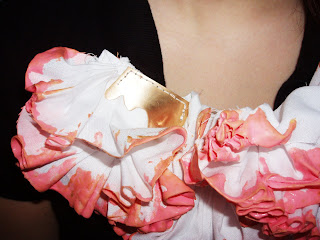

Frills, Thrills but no Automobiles
So I had to think of alternative connections did I?
I had to make my piece bigger did I?
FINE!


I made sheet pieces of dyed latex which I wedged in between the fabric and the metal before riveting them all together.
I quite liked these pieces. It was nice to add a contemporary and intriguing material into my work. But I still had more experiments to do.
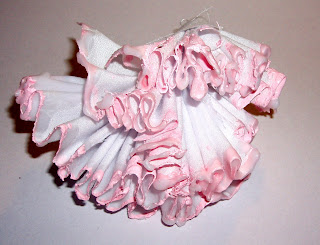
I tried dipping the ends of the ruffs into wax. This meant that the fabric was stiffened into a set position, and, despite looking soft and flexible, the fabric would be hard and solid. I then combined the wax with acrylic paint to add some colour.
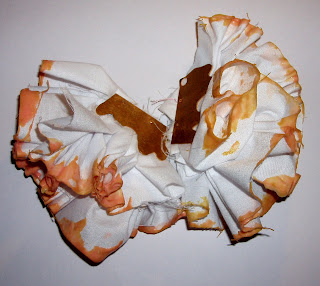
My next thought was if the latex would work in the same way and the acrylic paint. I saw no reason why it wouldn't, and thought it might have a nicer texture than the paint.
Now, the problem with the latex was that, even though I mixed a dye into it before applying it to the fabric, the natural pigment of the latex seemed to grow through the thinner parts of the latex over time, producing this vomit-like colour. Who wouldn't wan't to wear that? YUMMY!
I was also trying to think of alternative connections. Trying, and failing.
I sort of overcame the pigmentation problem though. I just added more dye!

I had to make my piece bigger did I?
FINE!
Ha, no, I didn't mind at all. In fact, I much prefer the work that I produced after the critique to the work that I did before it.
I kept the outside component how it was before, but just changed the inside bits from flat sheets to frilly, puffy, protruding things!
I then started to think about other materials that I could add into the piece. A friend was using some latex and I liked the effects she was getting from it, so I gave it a go and incorporated it into my own work in my own way.
I made sheet pieces of dyed latex which I wedged in between the fabric and the metal before riveting them all together.
I quite liked these pieces. It was nice to add a contemporary and intriguing material into my work. But I still had more experiments to do.
I tried dipping the ends of the ruffs into wax. This meant that the fabric was stiffened into a set position, and, despite looking soft and flexible, the fabric would be hard and solid. I then combined the wax with acrylic paint to add some colour.
My next thought was if the latex would work in the same way and the acrylic paint. I saw no reason why it wouldn't, and thought it might have a nicer texture than the paint.
Now, the problem with the latex was that, even though I mixed a dye into it before applying it to the fabric, the natural pigment of the latex seemed to grow through the thinner parts of the latex over time, producing this vomit-like colour. Who wouldn't wan't to wear that? YUMMY!
I was also trying to think of alternative connections. Trying, and failing.
I sort of overcame the pigmentation problem though. I just added more dye!
B-B-B-Bad to the Blogging B-B-B-Bone
I haven't blogged in AGES, I know. But, I have a valid reason. I've been working so hard! But at least that means I have lots to share now that I'm playing the role of the Prodigal Blogger.
 My production methods for these models brought the realisation that this form perhaps wasn't the best for a Batch Production module seeing as, to reproduce this effect, each piece would have to be soldered into place. So I had to think of another way to build my component into a piece... Alongside the project we were also being taught some useful batch production methods. My favourite of these methods was 'Lost Wax Casting' which involves producing a wax master which then gets set into a mould of plaster, burnt out and then replaced with the molten metal of choice. What was extra lovely about this demo was that we actually got to make a piece ourselves that we could then get cast in the metal of our choice, and then buy. Here's what I did...
 Please excuse the blob on the bottom of the ring shank, this photo was take prior to finishing because I was so excited to share it with the world! It was quite an expensive piece and cost me £22.50 in silver grain, but it IS pretty weighty. I love it though, and although I don't usually wear silver I've been wearing this. I think that I don't mind the colour because it's not a dainty, delicate piece. It's chunky and heavy, and I made it!
 Sortly after doing these models my class had a critique. By this time I had made a metal version of this. For some reason I can't find any photos of it so I'll have to describe it as best I can! The flappy bits on the inside were cotton, and either side of the flappy bits was a piece of gilding metal. Instead of the cocktail sticks I had made metal rivets, which I used to hold each component together as well as joining the pieces onto the next one. My design proposal was to make a brooch that attatched from on side of a shirt/blouse collar to the other, or hooked onto buttons/botton holes so that a nice frill could be added to any outfit! However, when it came to the critique it was suggested that I think of alternative connections to rivets and that instead of moving away from the big frilly things I was looking at before that I embrace it more, and make my piece frillier and bigger.
So...brace yourselves!
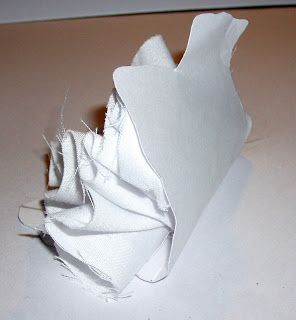
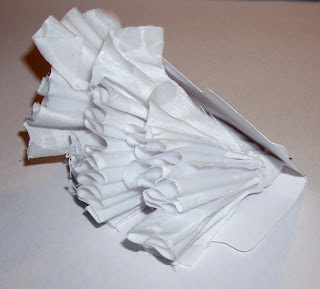
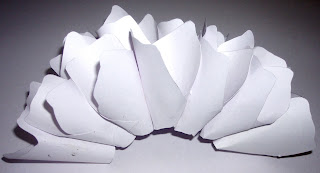
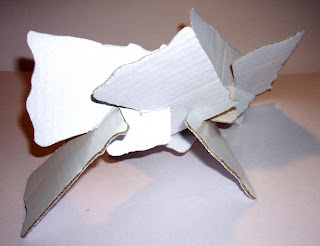
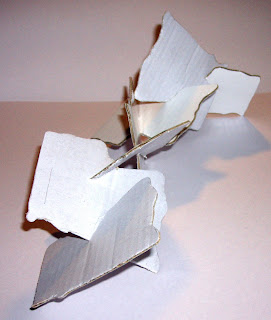
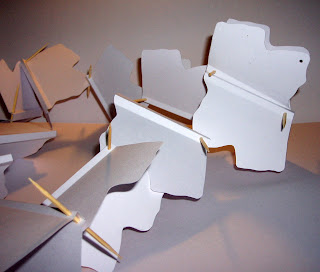
Where did I leave you then? Ahh, I was struggling for a direction for my Batch Production project wasn't I. Well, I sorted myself out, somehow. I went for the pencil shavings, which lead me onto frills, frills and more frills. I took the pencil shaving drawings and simplified them, from these drawings I selected one, which I cut out and used as a 'component', a form that I would repeat multiple times to create a final piece of some sort. To start with I tried to mimic the form of a ruff or a frill. I was happy with the effect that this had with my paper models. To make these I curled the component into a cone shape and glued them together in rows.
My production methods for these models brought the realisation that this form perhaps wasn't the best for a Batch Production module seeing as, to reproduce this effect, each piece would have to be soldered into place. So I had to think of another way to build my component into a piece... Alongside the project we were also being taught some useful batch production methods. My favourite of these methods was 'Lost Wax Casting' which involves producing a wax master which then gets set into a mould of plaster, burnt out and then replaced with the molten metal of choice. What was extra lovely about this demo was that we actually got to make a piece ourselves that we could then get cast in the metal of our choice, and then buy. Here's what I did... Please excuse the blob on the bottom of the ring shank, this photo was take prior to finishing because I was so excited to share it with the world! It was quite an expensive piece and cost me £22.50 in silver grain, but it IS pretty weighty. I love it though, and although I don't usually wear silver I've been wearing this. I think that I don't mind the colour because it's not a dainty, delicate piece. It's chunky and heavy, and I made it!
And now back to the main project...I was trying to think of other ways to build something bigger with my single component. We were encouraged to think of new, innovative connections, ones that involved our component joining to the next one without an extra component. This was hard, very hard. I felt my creativity was shutting down on me. If I'm honest, I sort of started to give up at this point in the project. A few other people around me seemed to, and I didn't find myself inspired by the work that the people who were getting on were doing. I don't mean that I didn't like their work, it just wasn't...me. The sort of ideas that were working involved a lot of geometric, sharp, smooth and pointy shapes. I do like simplistic designs, but I also like soft and gentle shapes. I tried to conform to the idea of slotting pieces together, but didn't like any of the results..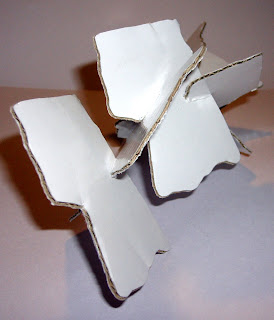
Subscribe to:
Comments (Atom)


